What to Do Before Applying Paint on Your Home’s Walls

You can refresh your home’s appearance in several ways, like replacing furniture or upgrading your flooring. However, changing paint palettes is one simple yet impactful way to revitalize your home’s look. Unfortunately, many homeowners underestimate the work it takes to finish a paint job, even if it’s for their home’s interiors. A small mistake in the preparation can lead to costly readjustments, which is why it’s necessary to know the nuances of prepping for your home’s paint job.
A Beginner’s Guide to Painting a Home’s Surfaces
Figuring out the right palette for your home’s new look won’t benefit you if you can’t apply it correctly. If you rush yourself and act rashly, you can end up with cracked paint and odd-looking surfaces. This is why it’s crucial to go through a delicate pre-painting process.
If you plan to revitalize your home through a paint job, here’s a five-step guide you should follow:
Step#1: Clean Your Painting Area
Your first task is to protect any other object or furnishing that shouldn’t be part of your paint job. Give yourself enough space to work on your walls and ceilings by removing obstacles on the floor. It’s best to move all small items, plants, and trinkets away. If possible, move heavier furniture or at least move them out of the way. Before moving anything, don’t forget to take a picture for reference when returning all your room’s objects to their proper places.
Step#2: Treat Your Surfaces
Once you have enough space to work with, it’s time to treat your walls by giving them a deep clean and removing protruding objects or filling gaps. You may encounter mildew, mold, wood rot, and other forms of damage that will need repairs beforehand. Remember to note these infected areas to receive the proper remedy. Don’t forget to scrape off old paint, especially if it’s starting to peel and appear flaky. Simply painting over them will make your new layer prone to peeling as well.
Step#3: Cover All Unmovable Objects
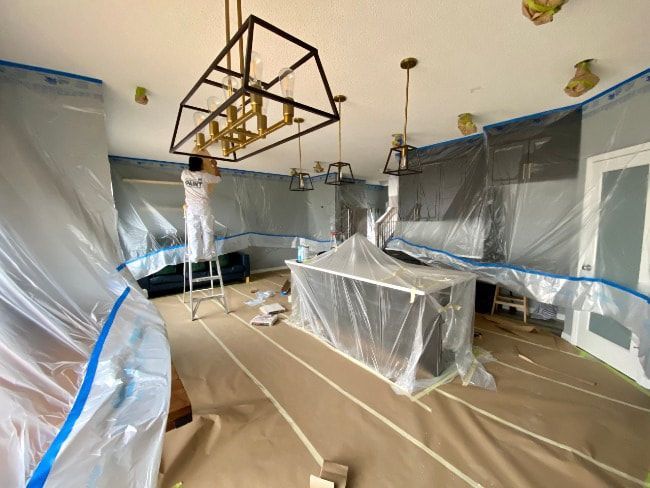
After cleaning your walls and ceilings, your next task is to secure any areas that should not be painted over. Remember to use the right material that won’t allow the paint to seep through. Plastic and tarps work best, but a double layer of newspapers could also be enough. Remember to tape off nooks and corners like baseboards and window frames so you can easily peel off paint that crosses over from your walls and ceiling areas.
Step#4: Apply a Primer
Before applying the actual coat of paint, remember to use a primer to your home’s surface. Primers are great for concealing defects and giving a clear and long-term finish to your wall and ceiling paint’s final look. Remember that your store-bought paint will still blend with your canvas’s color. This is why it’s necessary to have a white base color to ensure that you’re getting the right shade for the color you’ll use. It’s best to use water-based primers if you’re repainting drywall. Otherwise, an oil-based primer is great for walls with heavy-duty usage.
Step#5: Coat Your Surfaces Evenly
You’re finally ready to work on your paint with a trusty paint roller and thick brush. Remember to use the same direction for the brush strokes and work your way from top to bottom. Don’t forget to have your windows open or keep fans on to give you proper ventilation while working.
Conclusion
Although painting small patches on your wall can be manageable by yourself, it’s best to let professionals handle more extensive paint jobs. Any painting project that covers more than one room should be handled by paint experts, especially if you have to apply it to your home’s exteriors.
If you need local painting contractors in Edmonton, AB, we’re the right company to call. Our painting experts are masters of interior and exterior painting services for both commercial and residential projects. If you want a seamless paint job done, contact us today!


