
What You Need to Know About Drywall Repair – Our Guide
Drywall is a cost-effective material that is used in almost every home. At a relatively low cost, it delivers many benefits, including fire resistance, additional insulation, and more. Although it may be tough, it’s not indestructible. This is why after some time, you are going to need drywall patches.
While the repair itself is not rocket science, it still requires a level of expertise that only those with years of experience have. For this reason, before you try to take on a drywall hole repair as a project, here’s what you need to know about what drywall repairs:
You Must Have the Right Tools and Materials
Minor dents and holes that are no bigger than half an inch can be filled with a thin layer of drywall mud. To do the application correctly, you will need a three or four-inch putty knife that is especially for drywall installation, but it’s not the same as utility knives. You will need this particular type of knife because you will smoothen the filler until it’s flat and the same level as the rest of the wall. Other tools and materials you might need are:
Drywall screws
Drill
Hand sander/sanding sponge
Sandpaper
If the hole or crack is bigger than half an inch, you will also need a mesh that you’ll have to reinforce before you do any spackling. You cannot apply drywall mud directly into larger holes because the problem will occur again when the mud dries and crumbles.
You Must Be Aware of What’s Behind Your Walls
You need to be aware of things hidden behind your wall before you cut into it to do a drywall repair, like plumbing and electrical lines. Don’t assume that the contractors who built or renovated your home followed strict codes – it’s too big a risk to take for a drywall fix.
If you are intent on DIY-ing this, make sure that you check what’s in there with a flashlight. If it’s really necessary to make the hole bigger, cut horizontally using a drywall saw but be careful not to go deeper than one inch.
You Must Take Your Time When Sanding the Wall
You can’t rush the sanding process because if you do, it’s going to show. As soon as the part of the drywall you fixed is dry, sand it with fine-grit sandpaper. Once you are done with the first round, add the second layer of drywall mud and make sure that you go beyond the 1st layer’s edges by at least 2 inches. Wait for that second layer to dry, and then begin re-sanding.
You Must Wear Protective Mask and Gloves
Did you know that the drywall compound you are going to use has very fine particles that can hurt your lungs if you inhale them? If you plan to repair minor problems with the drywall, make sure to wear a dust mask, especially when you are sanding. Gypsum dust can also dry your hands, so you should grab a pair of disposable gloves and wear them throughout the entire project.
Conclusion
It’s indeed possible for you to handle minor repairs, but make sure that you are prepared for it because it can be a long process. You need patience and precision if you want your work to be flawless. Also, set your expectations as there’s a high chance that you won’t be able to get results similar to that of an expert.
Don’t forget that there are also drywall issues that are too big or too complicated for you to DIY. In such cases, it’s better to call reputable contractors who have been fixing drywalls for a long time.
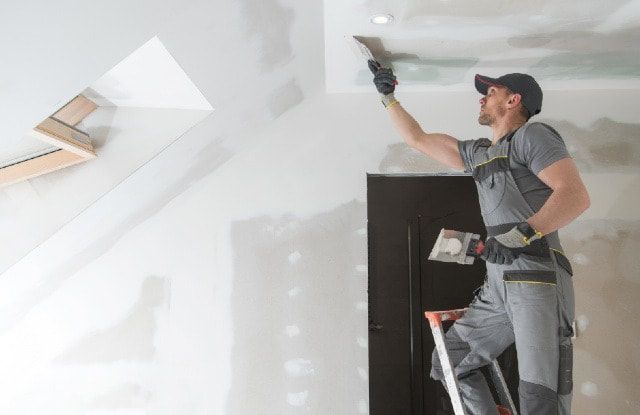
iPaint Painting’s team of professional painters in Edmonton, AB, has years of experience when it comes to drywall repair. No matter how big or small your drywall problem is, our experts can quickly fix it for you. Get in touch with us today to learn more about our services!