How To Prepare Your Home For Popcorn Ceiling Removal?
 popcorn ceiling removal with protective coverings and proper safety measures" width="934" height="622" />
Popcorn ceilings were quite common between the 1950-80s. Due to their affordability, they were one of the most popular home ceiling options.
Not only were they cost-effective and easy to install, but they were also the great option to hide imperfections including construction flaws. Given the acoustical traits of popcorn ceilings as they kept sound away from traveling, they were pretty popular in bedrooms.
However, as time passed, the charm of popcorn ceilings have also faded. Homeowners no longer favor popcorn ceilings. In fact, they are now deemed as unattractive. As a result, many homeowners are going ahead with popcorn ceiling removal.
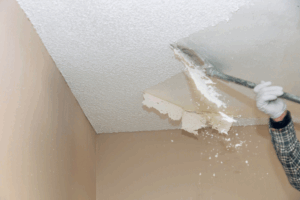
But it is neither an easy nor such a convenient task both from the perspective of homeowners and workers or contractors, therefore, it is necessary to take utmost safety precautions along with doing some preparations.
We bring to you a complete guide on how you can prepare your home for popcorn ceiling removal before going ahead with starting the actual work.
Seal Off the Floors
The removal is extremely messy. All the material that’s being scraped off turns into dust particles that will get everywhere.
Before the popcorn ceilings are removed, the floors must be completely covered from wall to wall. You can do this using thick plastic sheets. You would also need to use contractor paper to feature another layer on top of the thick plastic such that there is no chance of slipping while working within the area.
Close Off Doorways
In order to stop the popcorn ceiling material from making its way from one to the other parts of the home, a great idea is to shut off any doorways that lead outside of the space. This could also save you from the additional cleaning burden.
Cover Your Furniture
It is extremely significant to guard your furniture from the dust that is generated from the removal work. As such, it’s important that you simply cover every furniture piece. Get yourself some transparent plastic sheets and canopy each bit entirely, including the rear. Once you are doing, push each bit against the wall.
Make sure that sheets of plastic completely cover the furniture and go right to rock bottom. By covering your furniture during this way, any popcorn ceiling material will just slide right off each bit and onto the ground, containing the fabric and protecting your furniture at an equivalent time.
Gather the Required Tools
It is important to keep a set of tools or materials handy for easy and quick work, including shielding off home from the dust that generates during popcorn ceiling removal work. In addition to large sheets of plastic, contractor paper, and painter’s tape it is important to gather a couple of other tools to make the work easier including a bucket of water, garden sprayer, utility knife, ladder and cross bench.
From now on, whenever you think about getting a popcorn ceiling removal done in their homes, ensure that appropriate precautionary measures are taken to safeguard home premises as well as assets from any kind of mess created during the removal process.
Ready for a Fresh Coat?
Get a free, no-obligation estimate from Edmonton's trusted painting contractor. 15 years experience, 156 five-star reviews, and a 5-year written warranty.
Get Free Estimate